

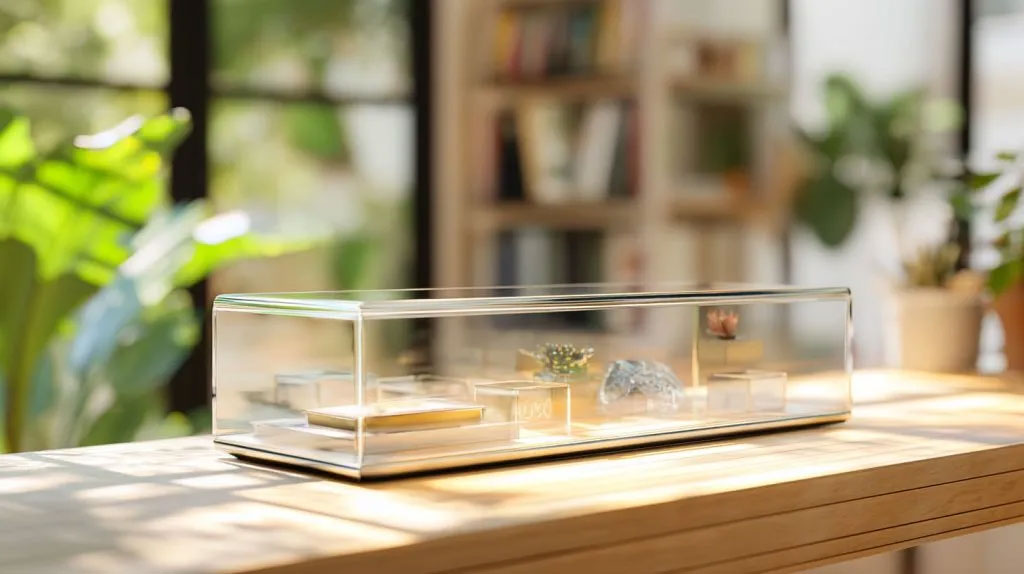
For collectors, every piece in their collection tells a story—whether it’s a rare action figure, a vintage coin set, a handcrafted model car, or a cherished sports memorabilia item. These treasures aren’t just objects; they’re a reflection of passion, dedication, and personal taste. To preserve their beauty, protect them from damage, and showcase them in all their glory, choosing the right display case is non-negotiable.
Among the various materials available, acrylic stands out for its clarity, durability, lightweight design, and affordability—making it the top choice for most collectors. However, even the highest-quality acrylic display case will fail to serve its purpose if it’s the wrong size. A case that’s too small will cramp your collectible, risk scratching or warping it, and ruin its visual appeal. A case that’s too large will make the item look lost, waste space, and potentially expose it to more dust and environmental factors.
Choosing the right acrylic display case size for your collectibles is a blend of precision, planning, and understanding your unique needs. It’s not just about measuring the item itself; it also involves considering future collection growth, display location, aesthetic preferences, and protection requirements.
In this comprehensive guide, we’ll walk you through every step of the process, from measuring your collectibles accurately to navigating different case styles, calculating clearance space, and avoiding common mistakes. By the end, you’ll know to select an acrylic display case that not only fits your item perfectly but also enhances its beauty and preserves it for years to come.
Why Acrylic Display Cases Are Ideal for Collectibles?
Before diving into size selection, let’s first explore why acrylic is the preferred material for collectible display cases. Understanding its benefits will help you appreciate why proper sizing is even more critical for this material—and how it impacts both protection and presentation.
Acrylic, also known as plexiglass or PMMA (polymethyl methacrylate), offers several advantages over glass, wood, or plastic alternatives. First and foremost is its optical clarity: acrylic has a light transmittance of 92-93%, which is higher than glass (around 80-85%), meaning your collectibles will be visible with minimal distortion. Unlike glass, acrylic is shatter-resistant—it’s 10 times more impact-resistant than glass, making it safer for valuable or fragile items, especially in homes with kids or pets. It’s also lightweight, which simplifies installation and reduces the risk of damage to shelves or surfaces that might not support heavy glass cases.
Acrylic is also highly customizable, available in various thicknesses (from 1/8 inch to 1 inch or more), finishes (clear, frosted, colored), and styles (countertop, wall-mounted, cube, display cabinets). This versatility means you can find an acrylic case that fits almost any collectible, from tiny lapel pins to large model airplanes. Additionally, acrylic is easy to clean and maintain—just wipe it with a soft, lint-free cloth and mild soap and water, avoiding abrasive cleaners that can scratch the surface.
However, acrylic’s flexibility (a benefit for durability) means that proper sizing is essential to prevent sagging or warping over time, especially for larger cases. A well-sized acrylic display case will distribute weight evenly, maintain its shape, and provide optimal protection for your collectible.
Step 1: Measure Your Collectibles Accurately (The Foundation of Sizing)
The first and most critical step in choosing the right acrylic display case size is measuring your collectible with precision. Even a small measurement error can lead to a case that’s ill-fitting, so it’s essential to use the right tools and follow a consistent process.
Tools You’ll Need
To get accurate measurements, gather these tools:
• Digital caliper: Ideal for small, intricate collectibles (e.g., coins, jewelry, mini figures) where precision to the millimeter or 1/16 inch matters. Digital calipers provide more accuracy than rulers or tape measures.
• Sturdy ruler or tape measure: For larger collectibles (e.g., action figures, model cars, sports jerseys). Choose a ruler with clear markings in both metric (centimeters, millimeters) and imperial (inches) units, as many display case manufacturers list sizes in both.
• Straightedge: To ensure you’re measuring straight lines, especially for irregularly shaped items.
• Notebook and pen: To record measurements—don’t rely on memory! Note down length, width, height, and any irregular dimensions.
• Soft cloth: To clean your collectible before measuring, as dust or debris can affect accuracy.
How to Measure Different Types of Collectibles
Collectibles come in all shapes and sizes, so the measurement process will vary slightly depending on the item. Below are guidelines for common collectible categories:
Small, Flat Collectibles (Coins, Stamps, Jewelry, Lapel Pins)
For flat items, focus on diameter (for round items) or length x width (for rectangular items) and thickness.
• Coins/stamps: Use a digital caliper to measure diameter (for coins) or length x width (for stamps). Measure thickness at the thickest point (e.g., the edge of a coin). For a set of coins, measure the largest coin in the set, as you’ll need a case that fits the biggest item.
• Jewelry (necklaces, bracelets, earrings): For necklaces, measure the length when laid flat (including the clasp). For bracelets, measure the inner circumference. For earrings, measure the height and width of the largest earring, including any dangling parts.
• Lapel pins: Measure the height and width of the pin, including any protruding details (e.g., enamel accents, pin backs).
3D Collectibles (Action Figures, Model Cars, Figurines, Dolls)
For 3D items, you’ll need to measurelength, width, and height—always at the item’s maximum points.
• Action figures/figurines: Stand the figure upright on a flat surface. Measure height from the base of the feet to the top of the head (or the tallest accessory, like a helmet or sword). Measure width from the widest point (e.g., shoulders, outstretched arms). Measure depth from the front to the back (e.g., chest to spine, or a weapon held behind the figure).
• Model cars/planes/ships: Measure length (from front to back), width (from side to side, including wings or mirrors), and height (from the base to the tallest point, like a roof or antenna). For models with movable parts (e.g., opening doors, folding wings), measure them in their displayed position—you don’t want to have to keep parts closed to fit the case.
• Dolls: Similar to action figures, measure height from feet to the top of the head (or hairpiece), width at the shoulders, and depth at the torso. If the doll is wearing a full skirt or elaborate outfit, measure the width and depth of the outfit, not just the doll itself.
Irregularly Shaped Collectibles (Sports Memorabilia, Artwork, Antiques)
Irregular items (e.g., baseball bats, football helmets, sculptures, vintage vases) require extra care. For these, measure the maximum dimensions in all three axes (length, width, height) to ensure the case can accommodate the item’s bulkiest parts.
• Football helmets: Measure circumference (around the widest part of the helmet), height (from the base of the chin strap to the top of the crown), and depth (from the front of the facemask to the back of the helmet).
• Baseball bats: Measure length (from the end of the handle to the end of the barrel) and diameter (at the widest part of the barrel). If displaying the bat horizontally, measure the height and width of the barrel to ensure clearance.
• Sculptures/antiques: Use a tape measure to find the tallest, widest, and deepest points. For curved or organic shapes, wrap a string around the widest part, then measure the string to get the circumference (if needed for cylindrical items like vases).
Pro Tip: Measure Twice, Buy Once
It’s easy to make a mistake when measuring, so always double-check your numbers. Measure the collectible at least twice, using different tools if possible (e.g., a ruler and a caliper for small items) to confirm accuracy. If you’re measuring a fragile item, handle it gently to avoid damage—consider placing it on a soft surface while taking measurements.
Not sure how to accurately measure your irregular or high-value collectibles?
Reach out to us for professional guidance and a customized quote!
Step 2: Calculate Required Clearance Space (Don’t Skip This!)
Once you have your collectible’s measurements, the next step is to add clearance space. Clearance is the gap between the collectible and the inside of the acrylic case, and it’s essential for several reasons:
• Protection: A tight fit can scratch or dent your collectible, especially if the case is moved or jostled. Clearance prevents direct contact between the item and the acrylic.
• Air circulation: Proper clearance allows air to flow inside the case, reducing the risk of moisture buildup (which can cause mold, rust, or discoloration, especially for metal or fabric collectibles).
• Aesthetics: A small gap around the item makes it look more balanced and intentional, rather than cramped. It also highlights the collectible by creating a “frame” of negative space.
• Accessibility: Clearance makes it easier to insert and remove the collectible from the case without damaging it.
How Much Clearance Do You Need?
The amount of clearance depends on the size, weight, and fragility of your collectible. Here are general guidelines:
• Small collectibles (under 3 inches in all dimensions): 1/4 to 1/2 inch (6 to 13 mm) of clearance on all sides (top, bottom, left, right, front, back). For extremely tiny items (e.g., micro figures, small coins), 1/8 inch (3 mm) may be sufficient, but avoid less than that.
• Medium collectibles (3 to 12 inches in any dimension): 1/2 to 1 inch (13 to 25 mm) of clearance. This is the most common range for items like action figures, model cars, and small figurines.
• Large collectibles (over 12 inches in any dimension): 1 to 2 inches (25 to 50 mm) of clearance. Larger items need more space to prevent the acrylic from pressing against them, especially if the case is tall (to avoid sagging).
• Fragile or delicate items (glass, porcelain, thin metal): Add an extra 1/4 to 1/2 inch of clearance to reduce the risk of damage. For items with sharp edges (e.g., swords, metal sculptures), ensure at least 1/2 inch of clearance to prevent scratching the acrylic.
Example: Calculating Case Size for a Medium Action Figure
Let’s say you have a 6-inch action figure with the following measurements: Height = 6 inches, Width = 2.5 inches, Depth = 2 inches.
Using the medium collectible clearance guideline (1/2 inch on all sides):
• Case height = Figure height + top clearance + bottom clearance = 6 + 0.5 + 0.5 = 7 inches.
• Case width = Figure width + left clearance + right clearance = 2.5 + 0.5 + 0.5 = 3.5 inches.
• Case depth = Figure depth + front clearance + back clearance = 2 + 0.5 + 0.5 = 3 inches.
So, you’d need an acrylic display case that’s at least 7 x 3.5 x 3 inches (internal dimensions). If the case has a base or shelf, adjust the height accordingly—for example, if the base is 0.5 inches thick, the external height would be 7.5 inches.
Have trouble calculating the exact case size for your collectibles?
Send us your measurements, and we’ll help you find the perfect fit or customize one to suit you.
Step 3: Consider the Display Case Style and Installation Location
Acrylic display cases come in a variety of styles, each with unique sizing considerations. Additionally, where you plan to display the case (shelf, wall, countertop) will impact the maximum size you can accommodate.
Common Acrylic Display Case Styles and Sizing Tips
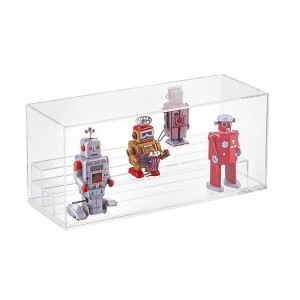
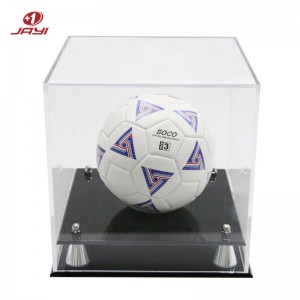
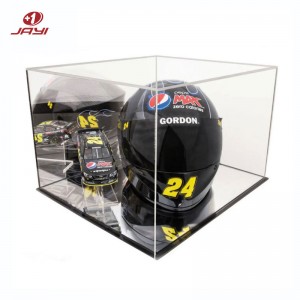
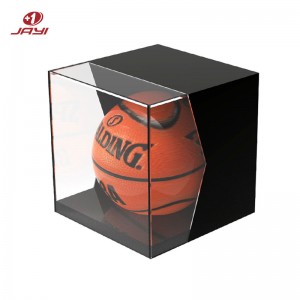
1. Countertop/Cube Cases
Countertop cases are standalone units that sit on shelves, desks, or tables. They’re available in cube shapes (equal length, width, height) or rectangular shapes, and are ideal for small to medium collectibles.
• Sizing considerations: Measure the surface where the case will sit to ensure it fits—don’t forget to account for the case’s external dimensions (including any base or feet). For cube cases, ensure the internal dimensions match your collectible’s size plus clearance. For rectangular countertop cases, prioritize height if displaying tall items (e.g., figurines) or length/width for flat items (e.g., model cars).
• Semantic keywords: acrylic cube display case, countertop acrylic display box, small acrylic display case for desk.
2. Wall-Mounted Cases
Wall-mounted acrylic cases save space and create a visually striking display (e.g., for sports memorabilia, artwork, or collectible sets). They come in shadow box styles (for flat items) or enclosed cabinets (for 3D items).
• Sizing considerations: Measure the wall space available, including height, width, and depth (wall-mounted cases protrude from the wall, so ensure there’s no obstruction from furniture or doorways). Check the weight capacity of the wall mount—acrylic is lightweight, but larger cases (over 12 inches) may still require sturdy mounting hardware (e.g., wall studs). For shadow boxes, ensure the depth is sufficient for your collectible plus clearance (shadow boxes typically have depths of 1 to 4 inches).
• Semantic keywords: wall-mounted acrylic display case, acrylic shadow box for collectibles, floating acrylic display case.
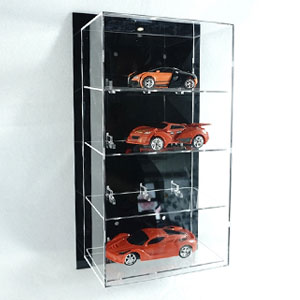
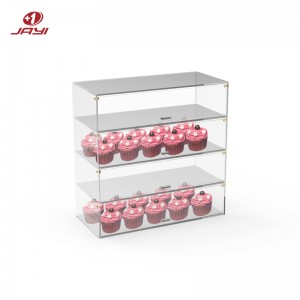
3. Display Cabinets (Multi-Shelf)
Acrylic display cabinets have multiple shelves, making them ideal for displaying large collections (e.g., action figure sets, coin collections, model trains). They can be countertop or floor-standing.
• Sizing considerations: Measure the height of each shelf—ensure the shelf height (distance between shelves) is sufficient for your tallest collectible plus clearance. Check the width and depth of each shelf to fit your largest item. For floor-standing cabinets, measure the floor space available and ensure the cabinet’s height doesn’t block windows or light fixtures.
• Semantic keywords: acrylic display cabinet with shelves, multi-shelf acrylic display case, floor-standing acrylic collectible case.
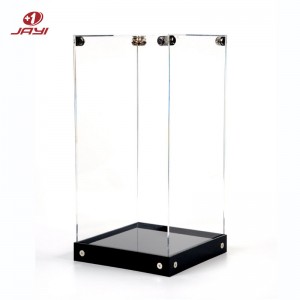
4. Custom Acrylic Cases
If you have an unusually shaped or sized collectible (e.g., a life-sized prop, a custom model, or a rare antique), a standard acrylic case may not fit. Custom cases are designed to your exact measurements, ensuring a perfect fit.
• Sizing considerations: Provide the manufacturer with your collectible’s exact measurements (including maximum dimensions) and desired clearance. Be sure to specify the case style (e.g., enclosed, open-top, with a base) and any additional features (e.g., locks, LED lighting). Custom cases are more expensive than standard ones, but they’re worth the investment for valuable or one-of-a-kind items.
• Semantic keywords: custom acrylic display case, bespoke acrylic collectible case, made-to-measure acrylic display box.
You Might Also Like Custom Acrylic Display Cases


Location-Specific Sizing Factors
• Shelves: Measure the shelf’s length, width, and height (distance from the shelf to the one above). Ensure the case’s external height doesn’t exceed the shelf clearance, and the width/length fits without hanging over the edge (hanging can cause instability).
• Desks/Countertops: Consider the overall aesthetic—don’t choose a case that’s too large for the surface (it will look cluttered) or too small (it will get lost). For high-traffic areas (e.g., kitchen counters), choose a case that’s compact and sturdy.
• Walls: Avoid placing large wall-mounted cases above furniture (e.g., sofas, beds) where they could fall if the mount fails. Ensure the case’s width doesn’t exceed the wall space between two fixtures (e.g., windows, doors).
• Floor: Floor-standing cabinets should fit within the room’s layout, leaving enough space for walking. Measure the area’s length and width, and ensure the cabinet’s height doesn’t overwhelm the room (e.g., a 6-foot cabinet in a small bedroom may look out of place).
Step 4: Account for Future Collection Growth
If you’re a passionate collector, chances are your collection will grow over time. When choosing an acrylic display case size, it’s wise to plan for future additions to avoid having to buy new cases constantly.
Tips for Planning for Growth
• Choose a larger case for sets: If you collect a series (e.g., Marvel action figures, Star Wars models), buy a case that can fit multiple items instead of individual small cases. For example, a 24 x 12 x 6 inch countertop case can hold 6-8 6-inch action figures with proper spacing.
• Opt for modular cases: Modular acrylic cases can be stacked or connected, allowing you to expand your display as your collection grows. Look for cases with interlocking edges or compatible dimensions (e.g., cube cases that stack vertically or horizontally).
• Leave extra space on shelves: When buying a cabinet or shelf, choose one with more shelf space than you currently need. This way, you can add more cases or larger items later without replacing the entire shelf.
• Avoid overcrowding: While it’s tempting to fill a case to the brim, overcrowding can damage collectibles and ruin the display. Leave 1-2 inches of space between items to keep the display organized and allow for future additions.
Balancing Current Needs and Future Growth
It’s important to strike a balance—don’t buy a case that’s so large it dwarfs your current collectible, but don’t buy one that’s too small to accommodate future additions. For example, if you currently have one 8-inch model car but plan to buy two more, a 24 x 12 x 8 inch case (with 1 inch of clearance per car) will fit all three without overcrowding.
Step 5: Consider Additional Features That Impact Sizing
Many acrylic display cases come with additional features that can affect internal or external dimensions. When choosing a size, factor in these features to ensure they don’t compromise the fit of your collectible.
Common Features to Consider
1. Bases and Shelves
Most acrylic cases have a base (for countertop/wall-mounted cases) or shelves (for cabinets). Bases can add 0.5 to 2 inches to the external height, while shelves reduce the available height between levels.
• If the case has a removable shelf, measure the shelf’s thickness (typically 1/4 to 1/2 inch) and adjust the internal height accordingly.
• For cases with fixed shelves, ensure the distance between the shelf and the top of the case is sufficient for your collectible plus clearance.
2. Locks and Latches
Some acrylic cases (especially for valuable collectibles) come with locks or latches. These add a small amount to the external depth or width (usually 1/4 to 1/2 inch), so factor that into your space measurements (e.g., if the case is going on a narrow shelf).
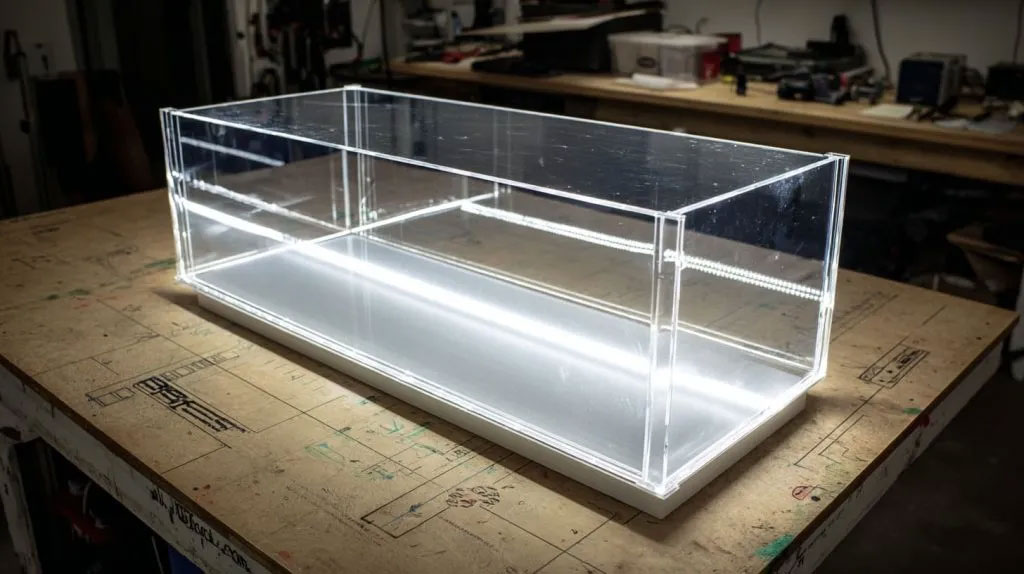
3. LED Lighting
LED lights are a popular addition to acrylic display cases, as they highlight collectibles and add visual appeal. Lighting systems can be built into the top, bottom, or sides of the case, which may reduce internal space.
• If the case has top-mounted LEDs, add 0.5 to 1 inch to the required internal height to avoid the lights pressing against the collectible.
• Side-mounted LEDs may reduce internal width or depth, so ensure there’s still enough clearance for your item.
4. Mirrored Backs
Mirrored backs add depth to the display and make collectibles more visible from multiple angles. They add a small amount to the external depth (usually 1/8 to 1/4 inch) but don’t affect internal dimensions significantly—just ensure the mirror doesn’t scratch the back of your collectible (add extra clearance if needed).

Step 6: Avoid Common Sizing Mistakes
Even with careful planning, it’s easy to make mistakes when choosing an acrylic display case size. Below are the most common pitfalls and how to avoid them:
Mistake 1: Measuring External Dimensions Instead of Internal
Many manufacturers list both internal and external dimensions, but internal dimensions are what matter for fitting your collectible. External dimensions include the case’s walls, base, and any features (e.g., locks, bases), so they’re larger than internal dimensions. Always confirm internal dimensions before buying—if a case is listed as 10 x 8 x 6 inches external, the internal dimensions may be 9 x 7 x 5 inches (depending on wall thickness).
Mistake 2: Forgetting to Account for Irregular Features
Collectibles often have irregular features (e.g., a sword held by an action figure, a crown on a doll, a wing on a model plane) that are easy to overlook when measuring. Always measure the item in its displayed position, including all protruding parts—otherwise, you may end up with a case that’s too small for these features.
Mistake 3: Ignoring Acrylic Thickness
Acrylic case walls range in thickness from 1/8 inch to 1 inch. Thicker walls provide better protection but reduce internal space. For example, a case with 1/4 inch thick walls will have internal dimensions 0.5 inches smaller than external dimensions (0.25 inches on each side). If you’re buying a case with thick walls, adjust your required internal dimensions accordingly.
Mistake 4: Buying a Case That’s Too Large for the Space
It’s easy to fall in love with a large, impressive display case, but if it doesn’t fit your shelf or wall space, it’s useless. Always measure the display location first, then choose a case that fits within those dimensions—don’t assume the case will fit.
Mistake 5: Not Testing the Fit (If Possible)
If you’re buying a case from a local store, bring your collectible (or a precise cutout of its dimensions) to test the fit. For online purchases, check the manufacturer’s return policy—many companies allow returns or exchanges if the case is the wrong size, but some charge restocking fees.
Step 7: Compare Sizes Across Manufacturers
Acrylic display case sizes can vary slightly between manufacturers, even if they’re listed as the same dimensions. This is due to differences in wall thickness, base design, and manufacturing tolerances. When shopping, compare internal dimensions across multiple brands to find the best fit.
Tips for Comparing Sizes
• Read product descriptions carefully: Look for detailed internal dimension listings, including height, width, depth, and shelf spacing (if applicable).
• Check customer reviews: Customers often mention if a case’s dimensions are accurate or if it’s smaller/larger than expected. Look for reviews from collectors with similar items to yours.
• Contact the manufacturer: If you’re unsure about dimensions, reach out to the manufacturer’s customer service for clarification. Most companies are happy to provide detailed measurements.
FAQ: Common Questions About Acrylic Display Case Sizing

Can I use a larger acrylic case for a small collectible?
While you can use a larger case, it’s not ideal for long-term display. A case that’s too big makes the collectible look lost and creates excess space for dust accumulation, which increases cleaning frequency. It also reduces the protective benefit—small items may shift and scratch against the acrylic if jostled. If you must use a larger case, add foam inserts or display risers to secure the item and fill empty space. For best results, choose a case that’s only 1/2 to 1 inch larger than the collectible (including clearance) to maintain aesthetic balance and protection.
How does acrylic thickness affect internal case dimensions?
Acrylic thickness directly reduces internal space—thicker walls mean smaller internal dimensions. For example, a case with 1/4-inch thick walls will have internal dimensions 0.5 inches smaller than external dimensions (0.25 inches subtracted from each side). A 1/2-inch thick wall reduces internal space by 1 inch total. This is critical for precise sizing: if your collectible needs 7x3.5x3 inches of internal space, a case with 1/4-inch walls will need external dimensions of 7.5x4x3.5 inches. Always confirm internal dimensions with manufacturers, as they often list external sizes first.
Do I need extra clearance for collectibles with movable parts?
Yes, collectibles with movable parts (e.g., model cars with opening doors, action figures with articulated limbs) require additional clearance. Measure the item in its fully extended or displayed position—never in a folded or compact state. Add 1/2 to 1 inch of extra clearance beyond the standard guideline to accommodate movement. For example, a model car with opening doors should have clearance for the doors to open fully without touching the acrylic. Failing to do this forces you to keep parts closed, defeating the purpose of showcasing the collectible’s features.
Can I stack acrylic display cases, and does that affect sizing?
You can stack acrylic cases if they’re designed for modular use, but sizing is key to stability. Choose cases with flat, even tops and bottoms to ensure they stack securely. Avoid stacking cases with uneven bases or protruding features (e.g., locks, handles) as they’ll wobble. For stacking, prioritize cases with thicker walls (at least 1/4 inch) to support the weight of upper cases. Also, measure the total height of the stacked cases to ensure they fit your display space (e.g., shelves, cabinets). Never stack more than 3-4 cases, even if modular, to prevent sagging or damage.
How do I adjust sizing for acrylic cases with LED lighting or mirrors?
LED lighting and mirrors slightly impact internal or external dimensions. Top-mounted LEDs add 0.5 to 1 inch to the case’s height, so increase your required internal height by this amount. Side-mounted LEDs reduce internal width/depth by 0.25 to 0.5 inches, so add extra clearance. Mirrored backs add 1/8 to 1/4 inch to external depth but don’t affect internal space—just ensure 1/4 inch of clearance between the collectible and the mirror to avoid scratching. Always check the manufacturer’s specs for feature-related dimension changes, and adjust your sizing calculations to account for these additions.
Conclusion
The cost of bulk acrylic display cases is influenced by a variety of factors, from the quality and thickness of the acrylic to the complexity of the design, customization options, order quantity, supplier choice, shipping costs, and market conditions.
By understanding these factors, you can make informed decisions that balance your budget with your needs, ensuring you get durable, functional display cases at the best possible price.
Whether you’re a retailer showcasing products, a collector protecting valuables, or a business promoting your brand, taking the time to evaluate these factors will help you find the perfect bulk acrylic display cases for your requirements.
Jayi Acrylic: China's Leading Professional Custom Acrylic Display Case Manufacturer

Founded in 2004, Jayi Acrylic is a leading professional manufacturer of custom acrylic display cases in China. With over 20 years of industry expertise, the company has established a solid reputation for delivering high-quality, tailored display solutions.
Core Strengths
Specializes in fully customized acrylic display cases, catering to the diverse needs of size, shape, and function for retail, exhibitions, and corporate use.
Adopts advanced CNC machining and precision polishing technologies, ensuring products feature exceptional transparency, durability, and seamless craftsmanship.
Serves a wide range of industries, including jewelry, cosmetics, electronics, and collectibles, with capabilities covering both small-batch orders and mass production.
Commitment to Customers
Jayi Acrylic prioritizes collaborative partnerships, working closely with clients from concept design to final delivery. Every product adheres to strict quality control standards, combining premium acrylic materials with meticulous manufacturing processes. As a trusted exporter, it offers competitive pricing and reliable service, helping businesses enhance product visibility and brand appeal globally.
Need a custom acrylic display case for your one-of-a-kind collectible?
Contact us now to share your requirements and get a competitive offer!
Post time: Jan-16-2026